How-to Guides
Main Content
Alert U Quick Reference: App Sign-in and Setup
Keep in Mind: Location, Audio, and Video are tracked only when permission is expressively given on the Everbridge App, ensuring the end-user has control and full privacy to easily opt-in and opt-out of these added services.
Creating an Account/ Signing in
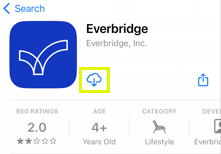
- Open the App Store on your IOS device or Google Play Store on your Android device.
- Search for Everbridge and download the Everbridge Mobile App.
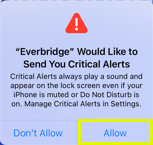
Note: Before step 3, you may be asked to “allow notifications”. If so, please select yes. - Once the App has downloaded, open the App. Select Allow for Everbridge to send you Critical Alerts.
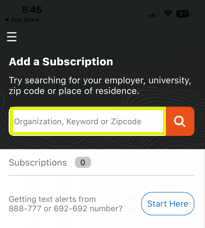
- Select Find an organization or subscription.

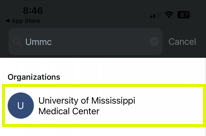
- In the search box, type UMMC and hit the magnifying glass to search.
- Select University of Mississippi Medical Center.
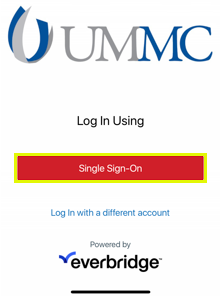
- On the sign-in page, select the Single Sign-On button.
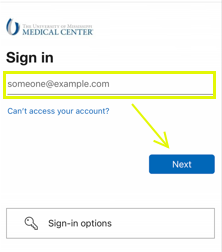
- Type in your UMMC email address and select the Next button.
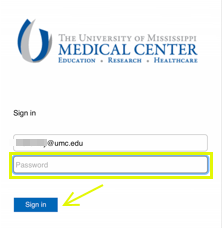
- Type in your UMMC Password and select the Next button.
Note: After step 9, Android users may be asked to allow Everbridge to access this device’s location. Please select While Using this App.
Setup
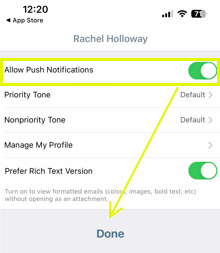
- Verify that Allow Push Notifications is on and select Done.
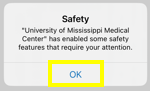
- When the Safety alert box appears, select OK.
- Read over the SOS alert box and select OK.
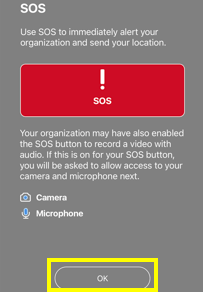
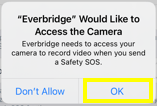
Note: Access to the front facing camera and microphone is only triggered when you hit the emergency button and can not be accessed any other time. - Select OK to allow Everbridge to access the camera.
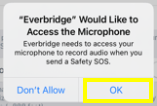
- Select OK to allow Everbridge to access the microphone.
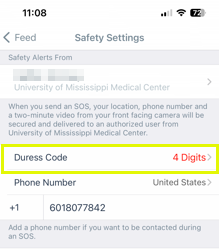
- In your safety settings, select Duress Code. Type in a 4-digit code that is unique to you and easily remembered. Select your country and enter your phone number.
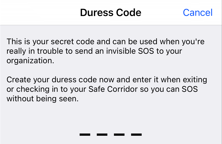
Note: Your duress code will be used with the safety features. Use your duress code to silently trigger an SOS when using the Safe Corridor feature.
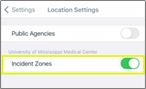
Enable Incident Zone
Note: Incident zone allows you to receive alerts when you are located within a critical event’s incident zone.
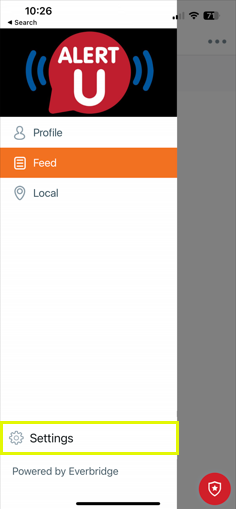
- Select Settings at the bottom of the page and then Location Settings.
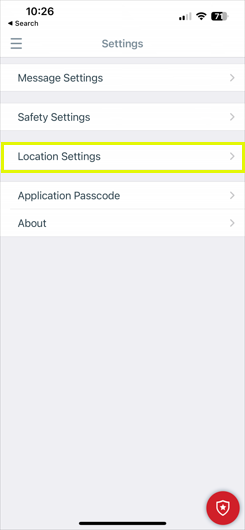
- Turn Incident Zone on.
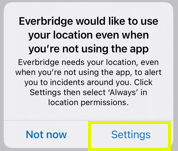
Note: You may see a pop up asking you to change your location setting. If you do, follow the steps #4-7 below. If you do not receive the pop-up, you can now close out the Everbridge application. - Select settings.
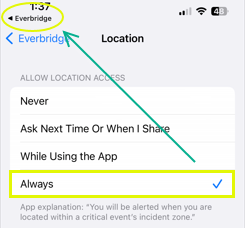
- Change location access to “always” and then select Everbridge in the top left corner.
- Once it takes you back to the Everbridge App, turn the Incident zones to on.
- You may now close out the Everbridge application.